Last night, I was messing around on Pinterest just looking for inspiration in the form of quotes, food, and fitness to come up with some goals for 2021. WELL — I was instantly reminded of an old classic that I hadn’t made in FOREVER and decided to whip up my own version of a lemon chicken piccata dish. BUT, this isn’t your average piccata…we’re talking both GLUTEN and DAIRY free. I have been dreaming up ways to make some of these classic dishes a little healthier and boy, did this brainchild absolutely blow me away.
HERE IS WHAT YOU NEED:
FOR THE POULTRY:
~2lb Chicken — I love the packs from Costco. For this recipe I used 1 pack of the tenderloins, but you could substitute one pack of breasts cut into tenderloin pieces, or even thighs.
Enough oil to cover the bottom of the pan you’re using— I like to use avocado oil, but you can use olive oil here if that’s what you have at home, too!
FOR THE COATING:
1 cup gluten free flour (Cup4Cup is my favorite 1:1 flour replacement at the moment)
1 tbsp salt
1 tsp pepper
1 tsp paprika
1 tsp garlic powder
FOR THE SAUCE:
1 shallot – diced
2 cloves of garlic
2 tbsp vegan butter *can use regular butter if dairy is not an issue* (loving the earth balance brand lately!)
12oz can of coconut milk (unsweetened)
1 tbsp arrowroot powder mixed equal parts with water
Salt, to taste (I’d start with about 1tsp and increase in small quantities…this will balance out the “coconut” flavor you might get)
1 tsp – pepper
1 lemon – juiced
Capers – to taste
INSTRUCTIONS:
1. Prepare chicken — take tenderloin/breast/thigh pieces and put in ziplock bag. Add flour, salt, pepper, paprika, and garlic powder to bag. Seal and shake. You can also follow a standard flour dredge method if you prefer! Make sure all sides of the chicken are coated with dry mixture.
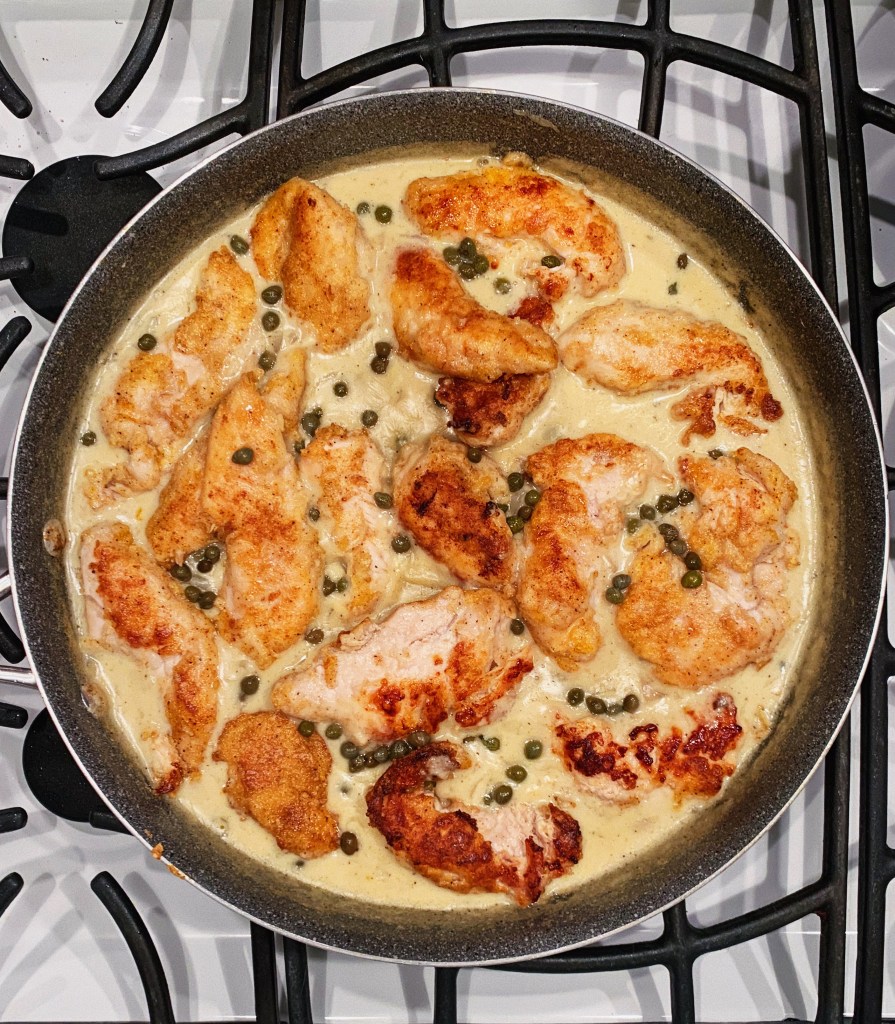
2. In a large skillet pan, heat oil on medium/high heat for a few minutes. Gently place chicken in pan and cook 4 minutes. Once a crust has formed, flip chicken and allow another 4 minutes to cook through (make sure you don’t see any pink!)
3. Once chicken is cooked and crust forms on both sides, remove chicken from the pan and set aside. Turn heat to medium and add garlic, shallot, and butter to the same pan. Cook until fragrant and garlic/shallot turn pale brown.
4. Add coconut milk to the pan and bring to a gentle boil. Add lemon, salt, pepper, and 2 tbsp capers to the sauce and allow the sauce to thicken — 3 minutes. Make sure you reduce the heat to low/medium if the sauce begins to boil quickly. Add in the arrowroot/water mixture and whisk into the sauce, stirring frequently. It’s important to make sure the arrowroot and water have completely mixed together before adding to the sauce. It should thicken immediately. Turn off the heat and add chicken back into the pan.
5. Top with additional capers, lemon slices, basil, or anything that makes you feel good! Enjoy!!!
TO NOTE:
For the sauce, you can sub half a can of coconut milk with some chicken broth if you are looking for a slightly less creamy sauce. You will still need to thicken it with the arrowroot sludge.
Serve with whatever you’d like! I made it with mashed potatoes, but serving over some gluten free noodles would be absolutely delicious as well! Let me know if you try it!
